Quick Start
This quick start guide explains how to integrate Gumband into your exhibit with our SDKs, each of which contains a library of functions and a websocket connection manager to facilitate communication between your exhibit and the Gumband platform.
Installing and Initializing the Gumband SDK
Install the Gumband library:
- Node.js
- Python
npm i @deeplocal/gumband-node-sdk
pip install gumband
Create a new exhibit in the Gumband UI and copy the exhibit ID and Authentication Token. You will use these two values to authenticate your exhibit with Gumband.
EXHIBIT_TOKEN=ae132...di2lk9
EXHIBIT_ID=1
Initialize the Gumband SDK with the basic required parameters:
- Node.js
- Python
import { Gumband } from "@deeplocal/gumband-node-sdk";
import { MANIFEST } from "./manifest.js";

const EXHIBIT_TOKEN = "ae132...di2lk9";
const EXHIBIT_ID = 1;

this.gumbandSDK = new Gumband(
    EXHIBIT_TOKEN,
    EXHIBIT_ID,
    MANIFEST
);
import asyncio
from gumband_python_sdk import Gumband
from manifest import MANIFEST

EXHIBIT_TOKEN = "ae132...di2lk9"
EXHIBIT_ID = 1

class GumbandWrapper:
  def __init__(self, exhibit_id, token, manifest):
    """
    Initialize the GumbandWrapper with necessary parameters.
    """
    self.gumband = Gumband(exhibit_id=exhibit_id, token=token, manifest=manifest)

  async def start(self):
    """
    Start the Gumband connection and keep it running.
    """
    await self.gumband.connect()
    while True:
      await asyncio.sleep(1)

# Instantiate and run the handler
if __name__ == "__main__":
  handler = GumbandWrapper(
    exhibit_id=EXHIBIT_ID,
    token=EXHIBIT_TOKEN,
    manifest=MANIFEST,
  )
  asyncio.run(handler.start())
where MANIFEST is a JSON object that defines what statuses, controls, and settings will be available to your exhibit; more on statuses, controls, and settings below. A basic manifest would look like this:
- Node.js
- Python
export const MANIFEST = {
  manifest: {
      statuses: [],
      controls: [],
      settings: []
  }
}
MANIFEST = {
  "manifest": {
      "statuses": [],
      "controls": [],
      "settings": []
  }
}
When you run your application, the SDK will authenticate itself with Gumband and you’ll see it come online:
 An exhibit instance in the Gumband UI showing as online, as indicated by the green icon.
When you run the node application, you will also notice that a new file has been created in the root project directory called local.db. This is a SQLite database managed by the Gumband SDK that will preserve all interactions locally in the event that the node application looses access to the internet. When the node application reconnects to the internet, the saved interactions will be automatically pushed to Gumband.
Health Monitoring
Exhibit Statuses
Statuses are string values that can track any state of your exhibit, allowing remote monitoring of exhibit health. The statuses available are unique per exhibit and must be configured through the manifest (learn more about the manifest in the Exhibit Manifest Configuration doc).
For example:
- Node.js
- Python
export const MANIFEST = {
  manifest: {
    statuses: [
      {
        id: 'screen-status',
        type: 'String',
        display: 'Screen is currently showing:',
        order: 0,
      },
      {
        id: 'last-game-played',
        type: 'String',
        display: 'Last game played:',
        order: 1,
      },
    ],
    controls: [],
    settings: [],
  },
};
MANIFEST = {
  "manifest": {
    "statuses": [
      {
        "id": 'screen-status',
        "type": 'String',
        "display": 'Screen is currently showing:',
        "order": 0,
      },
      {
        "id": 'last-game-played',
        "type": 'String',
        "display": 'Last game played:',
        "order": 1,
      },
    ],
    "controls": [],
    "settings": [],
  },
}
This manifest would configure statuses for the following exhibit instance in the Gumband UI:
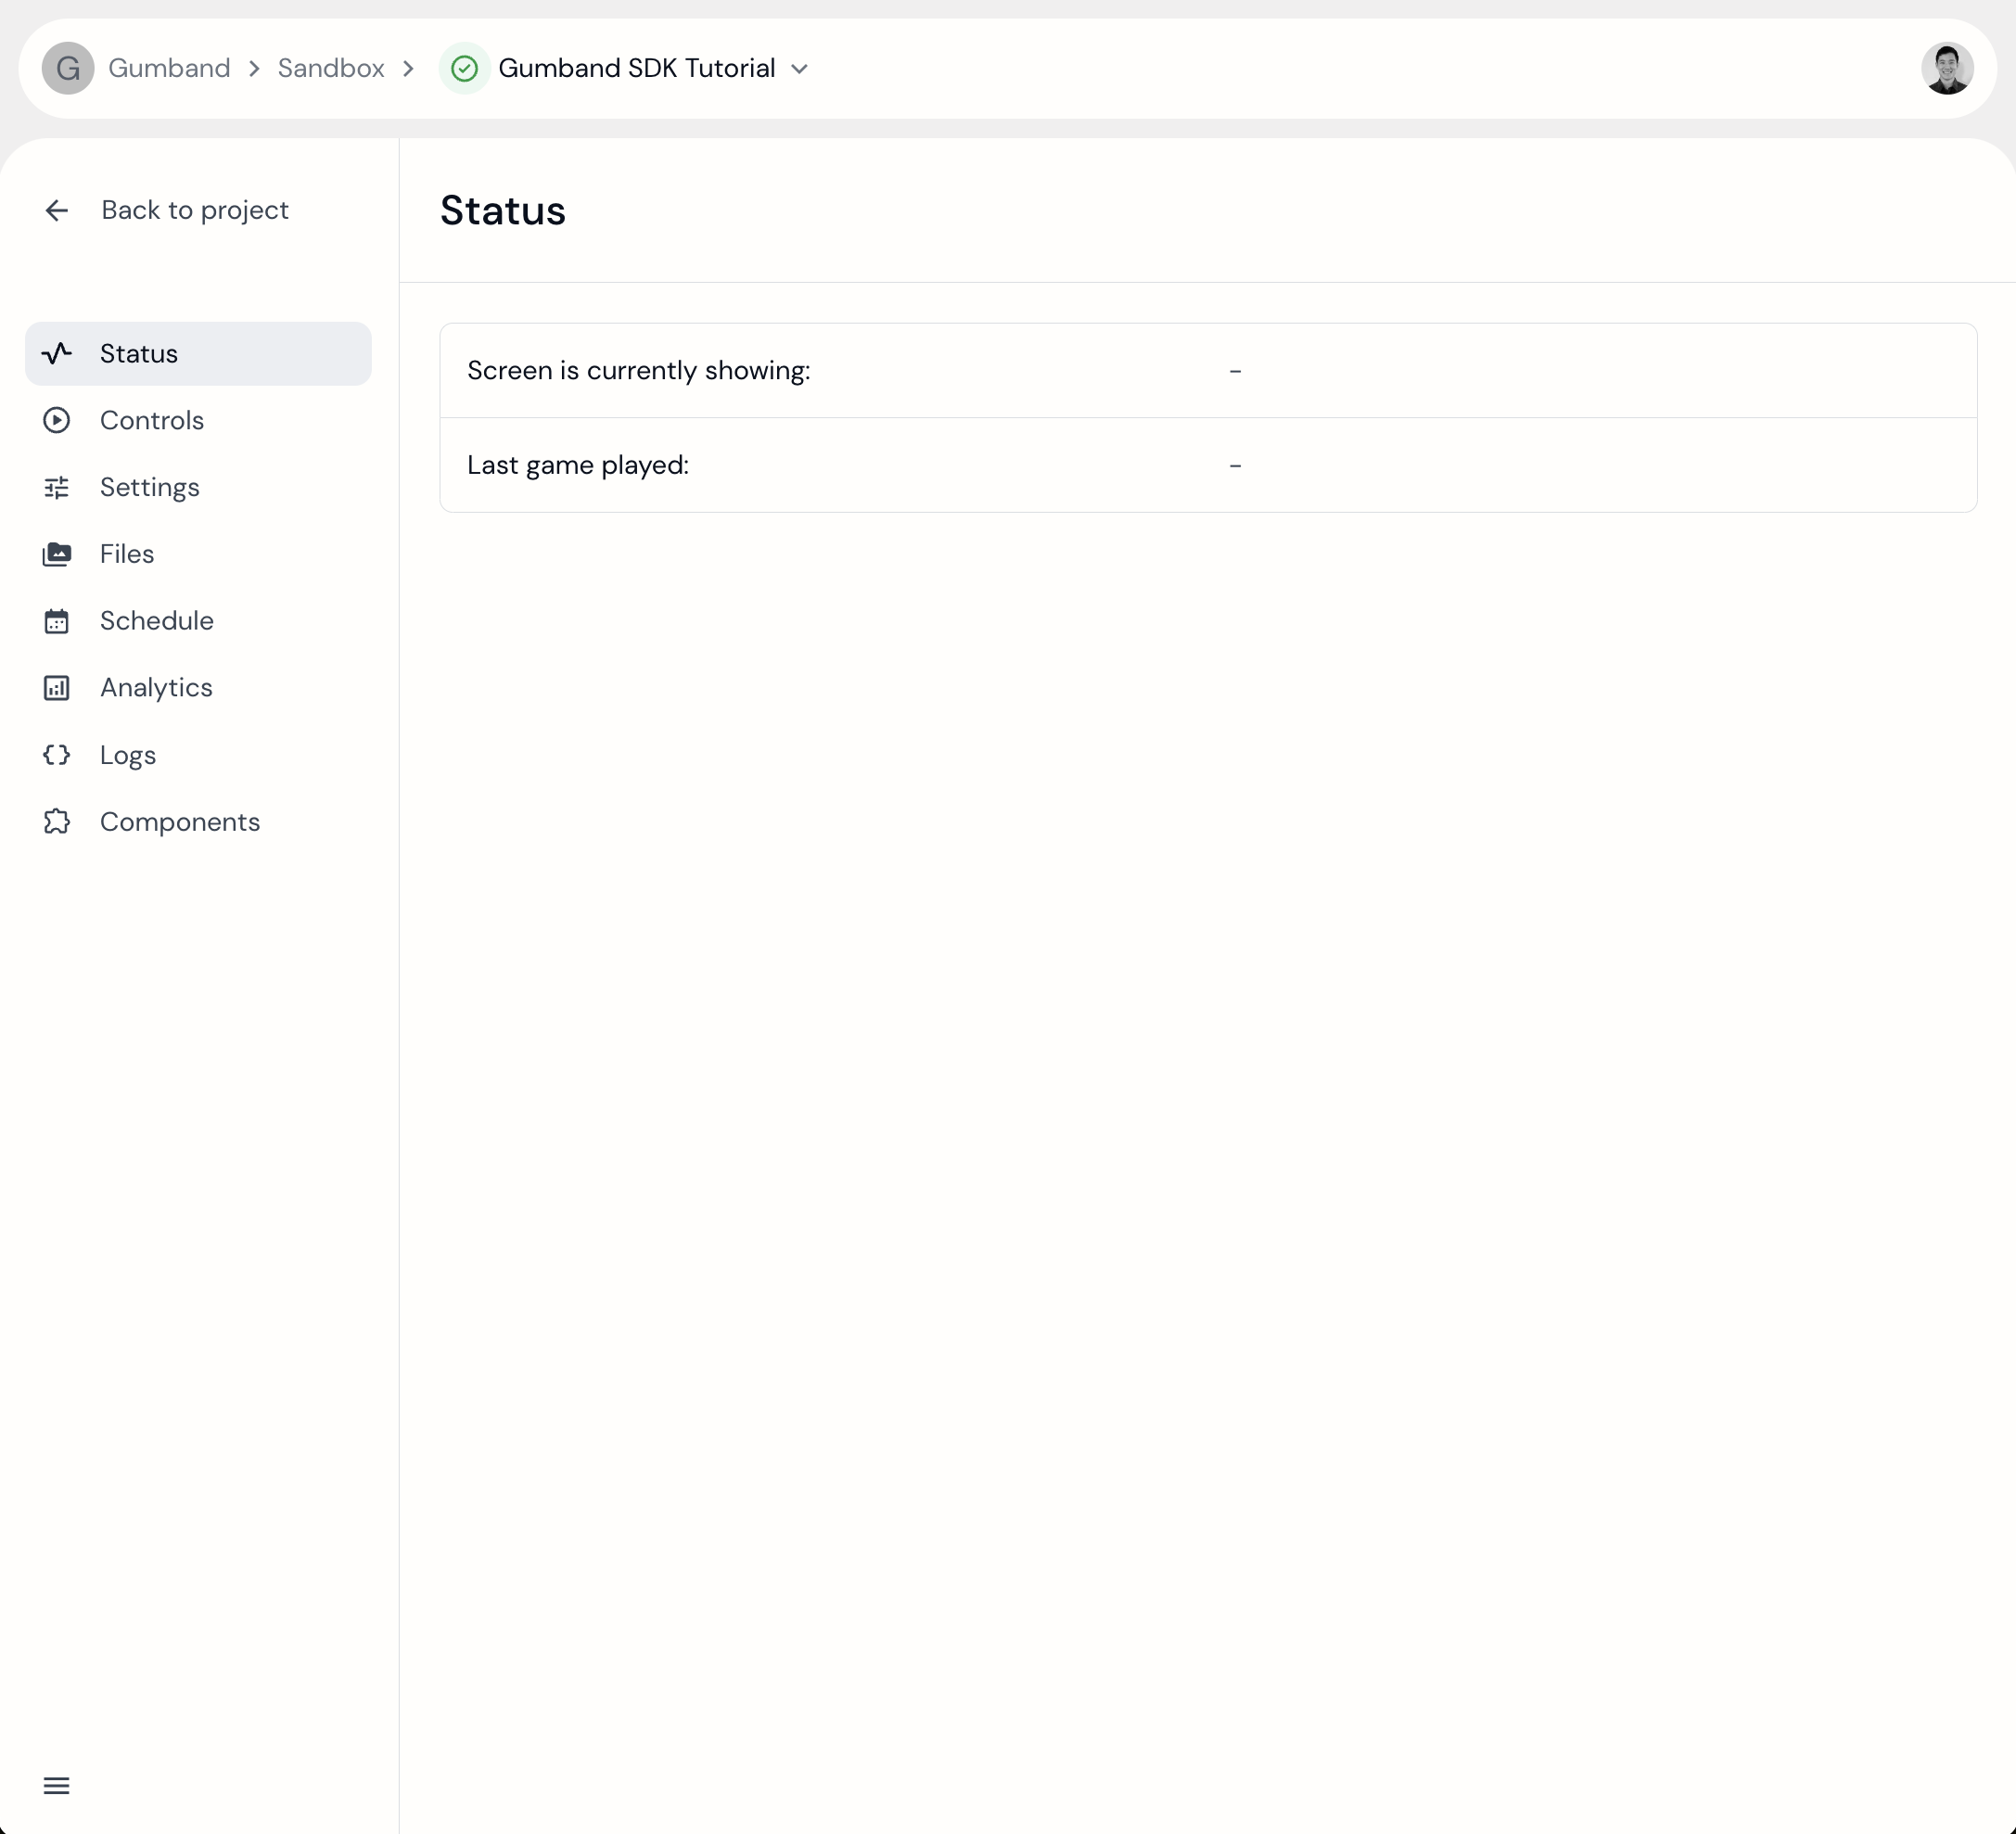 Two statuses shown on the Status page of the Gumband UI.
There is no event listener for when a status changes, since statuses are one-way communications from the exhibit to the Gumband cloud. A status can be updated through a simple function call. For example, imagine you have a screen that can be in many states, and you’d like the state of the screen to be a status in the Gumband UI:
- Node.js
- Python
...

function showDigitalSignageScreen() {
    //insert logic to switch screen to Digital Signage
    this.gumbandSDK.setStatus('screen-status', 'Digital Signage');
}
function goIntoStandbyScreenMode() {
    //insert logic to put screen in Stand By mode
    this.gumbandSDK.setStatus('screen-status', 'Stand By');
}
...

show_digital_signage_screen(self) {
    # insert logic to switch screen to Digital Signage
    self.gumband.set_status('screen-status', 'Digital Signage');
}

go_into_standby_screen_mode(self) {
    # insert logic to put screen in Stand By mode
    self.gumband.set_status('screen-status', 'Stand By');
}
The screen-status string matches the ID of the status defined in the manifest.
Log Messages
This feature is currently only available through the Node SDK.
Gumband can be used to capture various types of logs. There are four different function calls in the SDK to dispatch different levels of logs to the Gumband cloud for your exhibit:
this.gumbandSDK.logger.debug('This is a debug log');
this.gumbandSDK.logger.info('This is an info log');
this.gumbandSDK.logger.warn('This is a warn log');
this.gumbandSDK.logger.error('This is an error log');
These calls would create the following logs in the Gumband UI:
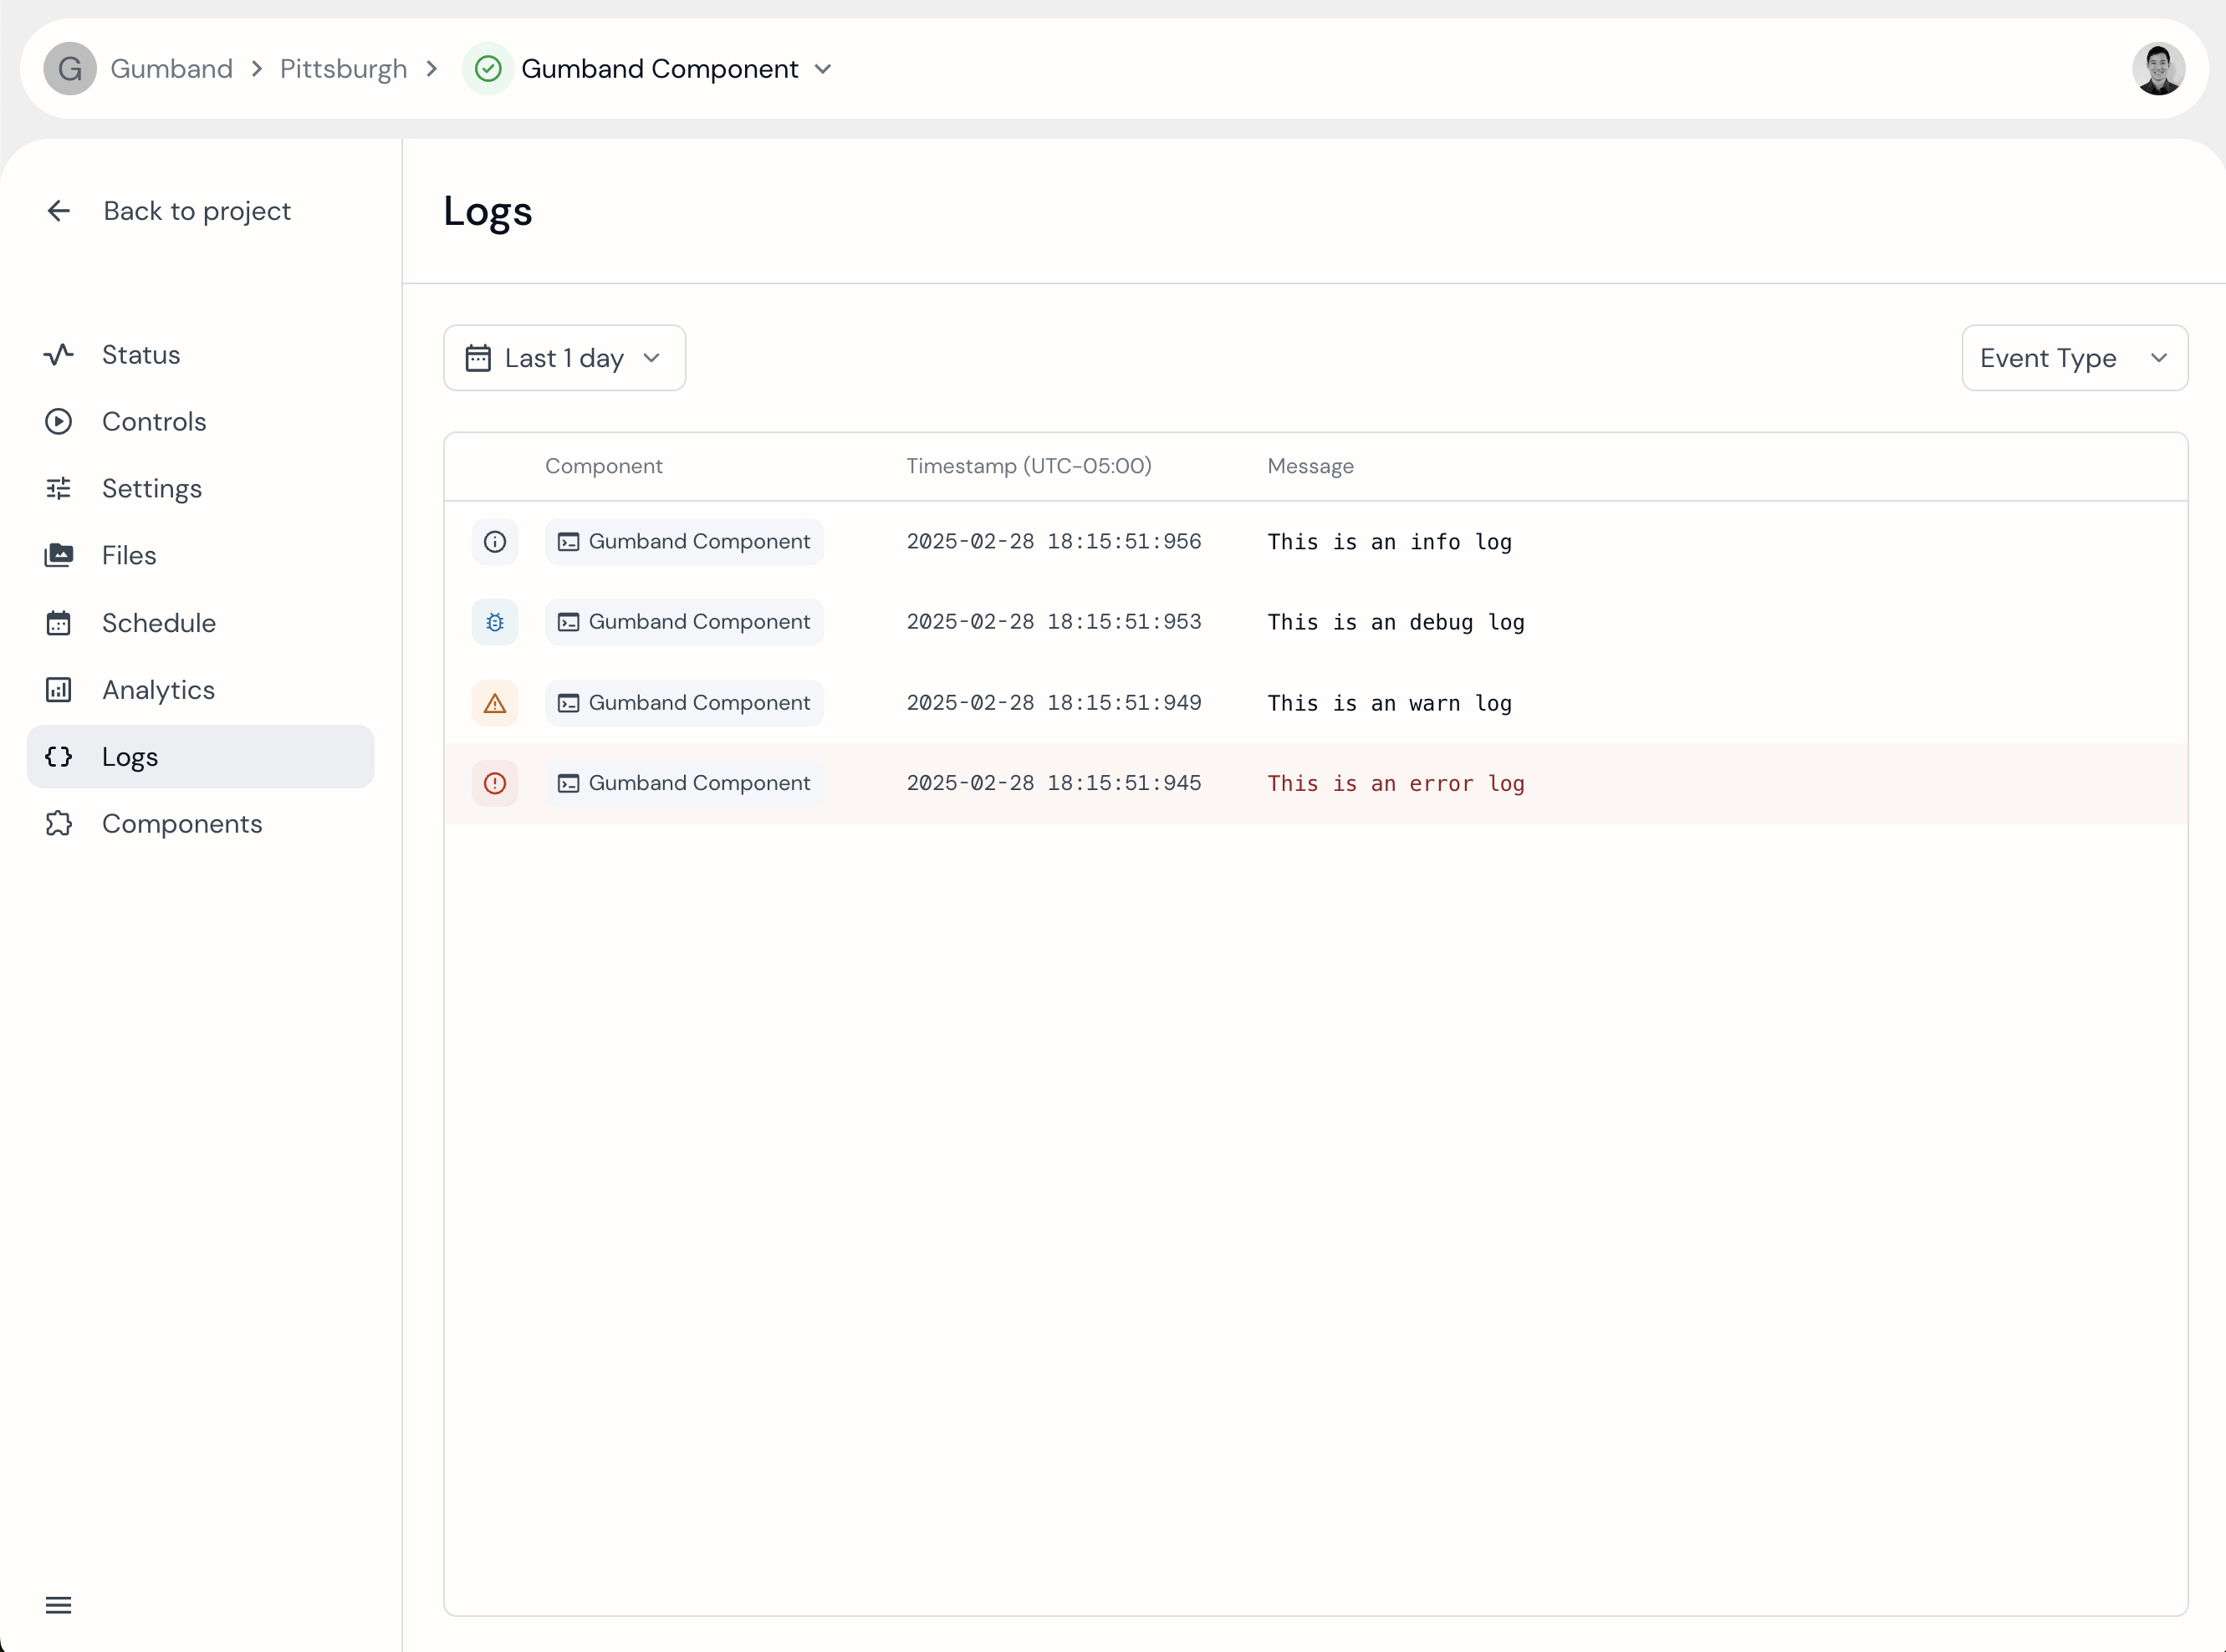 The logs tab for an exhibit in the Gumband UI.
- Debug logs will remain in the Gumband cloud for 24 hours
- Info logs will remain for 72 hours
- Warn logs will remain for 1 week
- Error logs will only be deleted when a user deletes them
Dispatching Email Alerts
When a critical component of your exhibit goes down, you want to know right away. Gumband has email notifications built-in for a number of use cases, such as when the exhibit goes offline/online, but you can also define your own custom email notifications with one of the included library functions:
- Node.js
- Python
...

//listening for errors on a connection to some generic third party integration
thirdPartyIntegration.on('error', () => {
    this.gumbandSDK.notifications.email(
        'An error occurred with the third party integration'
    );
});
...

#listening for errors on a connection to some generic third party integration
third_party_integration.on('error', self.on_third_party_error)

async def on_third_party_error(self):
  self.gumband.send_email_notification(
    'An error occurred with the third party integration'
  )
To subscribe to these notifications, please reach out to support@gumband.com. The ability to subscribe to them in the Gumband UI is coming soon!
Configuration and Content
Configuring Settings
Settings are configurations for your exhibit which could control anything from text copy to the RPMs of a motor, and, like statuses, they are also defined through the manifest:
- Node.js
- Python
export const MANIFEST = {
    manifest: {
        statuses: [],
        controls: [],
        settings: [
            {
                id: 'header',
                type: 'TextInput',
                display: 'Header Copy',
                default: 'Gumband Demo',
                order: 0,
            },
            {
                id: 'subheader',
                type: 'TextInput',
                display: 'Subheader Copy',
                default: 'Digital Signage',
                order: 1,
            },
            {
                id: 'body',
                type: 'TextInput',
                display: 'Body Copy (separate by | for new paragraph)',
                default: 'Gumband is an interactive experience tool',
                order: 2,
            },
            {
                id: 'main-image',
                type: 'FileSelection',
                display: 'Image Asset',
                order: 3,
            },
        ],
    },
};
MANIFEST = {
    "manifest": {
        "statuses": [],
        "controls": [],
        "settings": [
            {
                "id": "header",
                "type": "TextInput",
                "display": "Header Copy",
                "default": "Gumband Demo",
                "order": 0,
            },
            {
                "id": "subheader",
                "type": "TextInput",
                "display": "Subheader Copy",
                "default": "Digital Signage",
                "order": 1,
            },
            {
                "id": "body",
                "type": "TextInput",
                "display": "Body Copy (separate by | for new paragraph)",
                "default": "Gumband is an interactive experience tool",
                "order": 2,
            },
            {
                "id": "main-image",
                "type": "FileSelection",
                "display": "Image Asset",
                "order": 3,
            },
        ],
    },
}
This manifest would configure settings for the following exhibit instance in the Gumband UI:
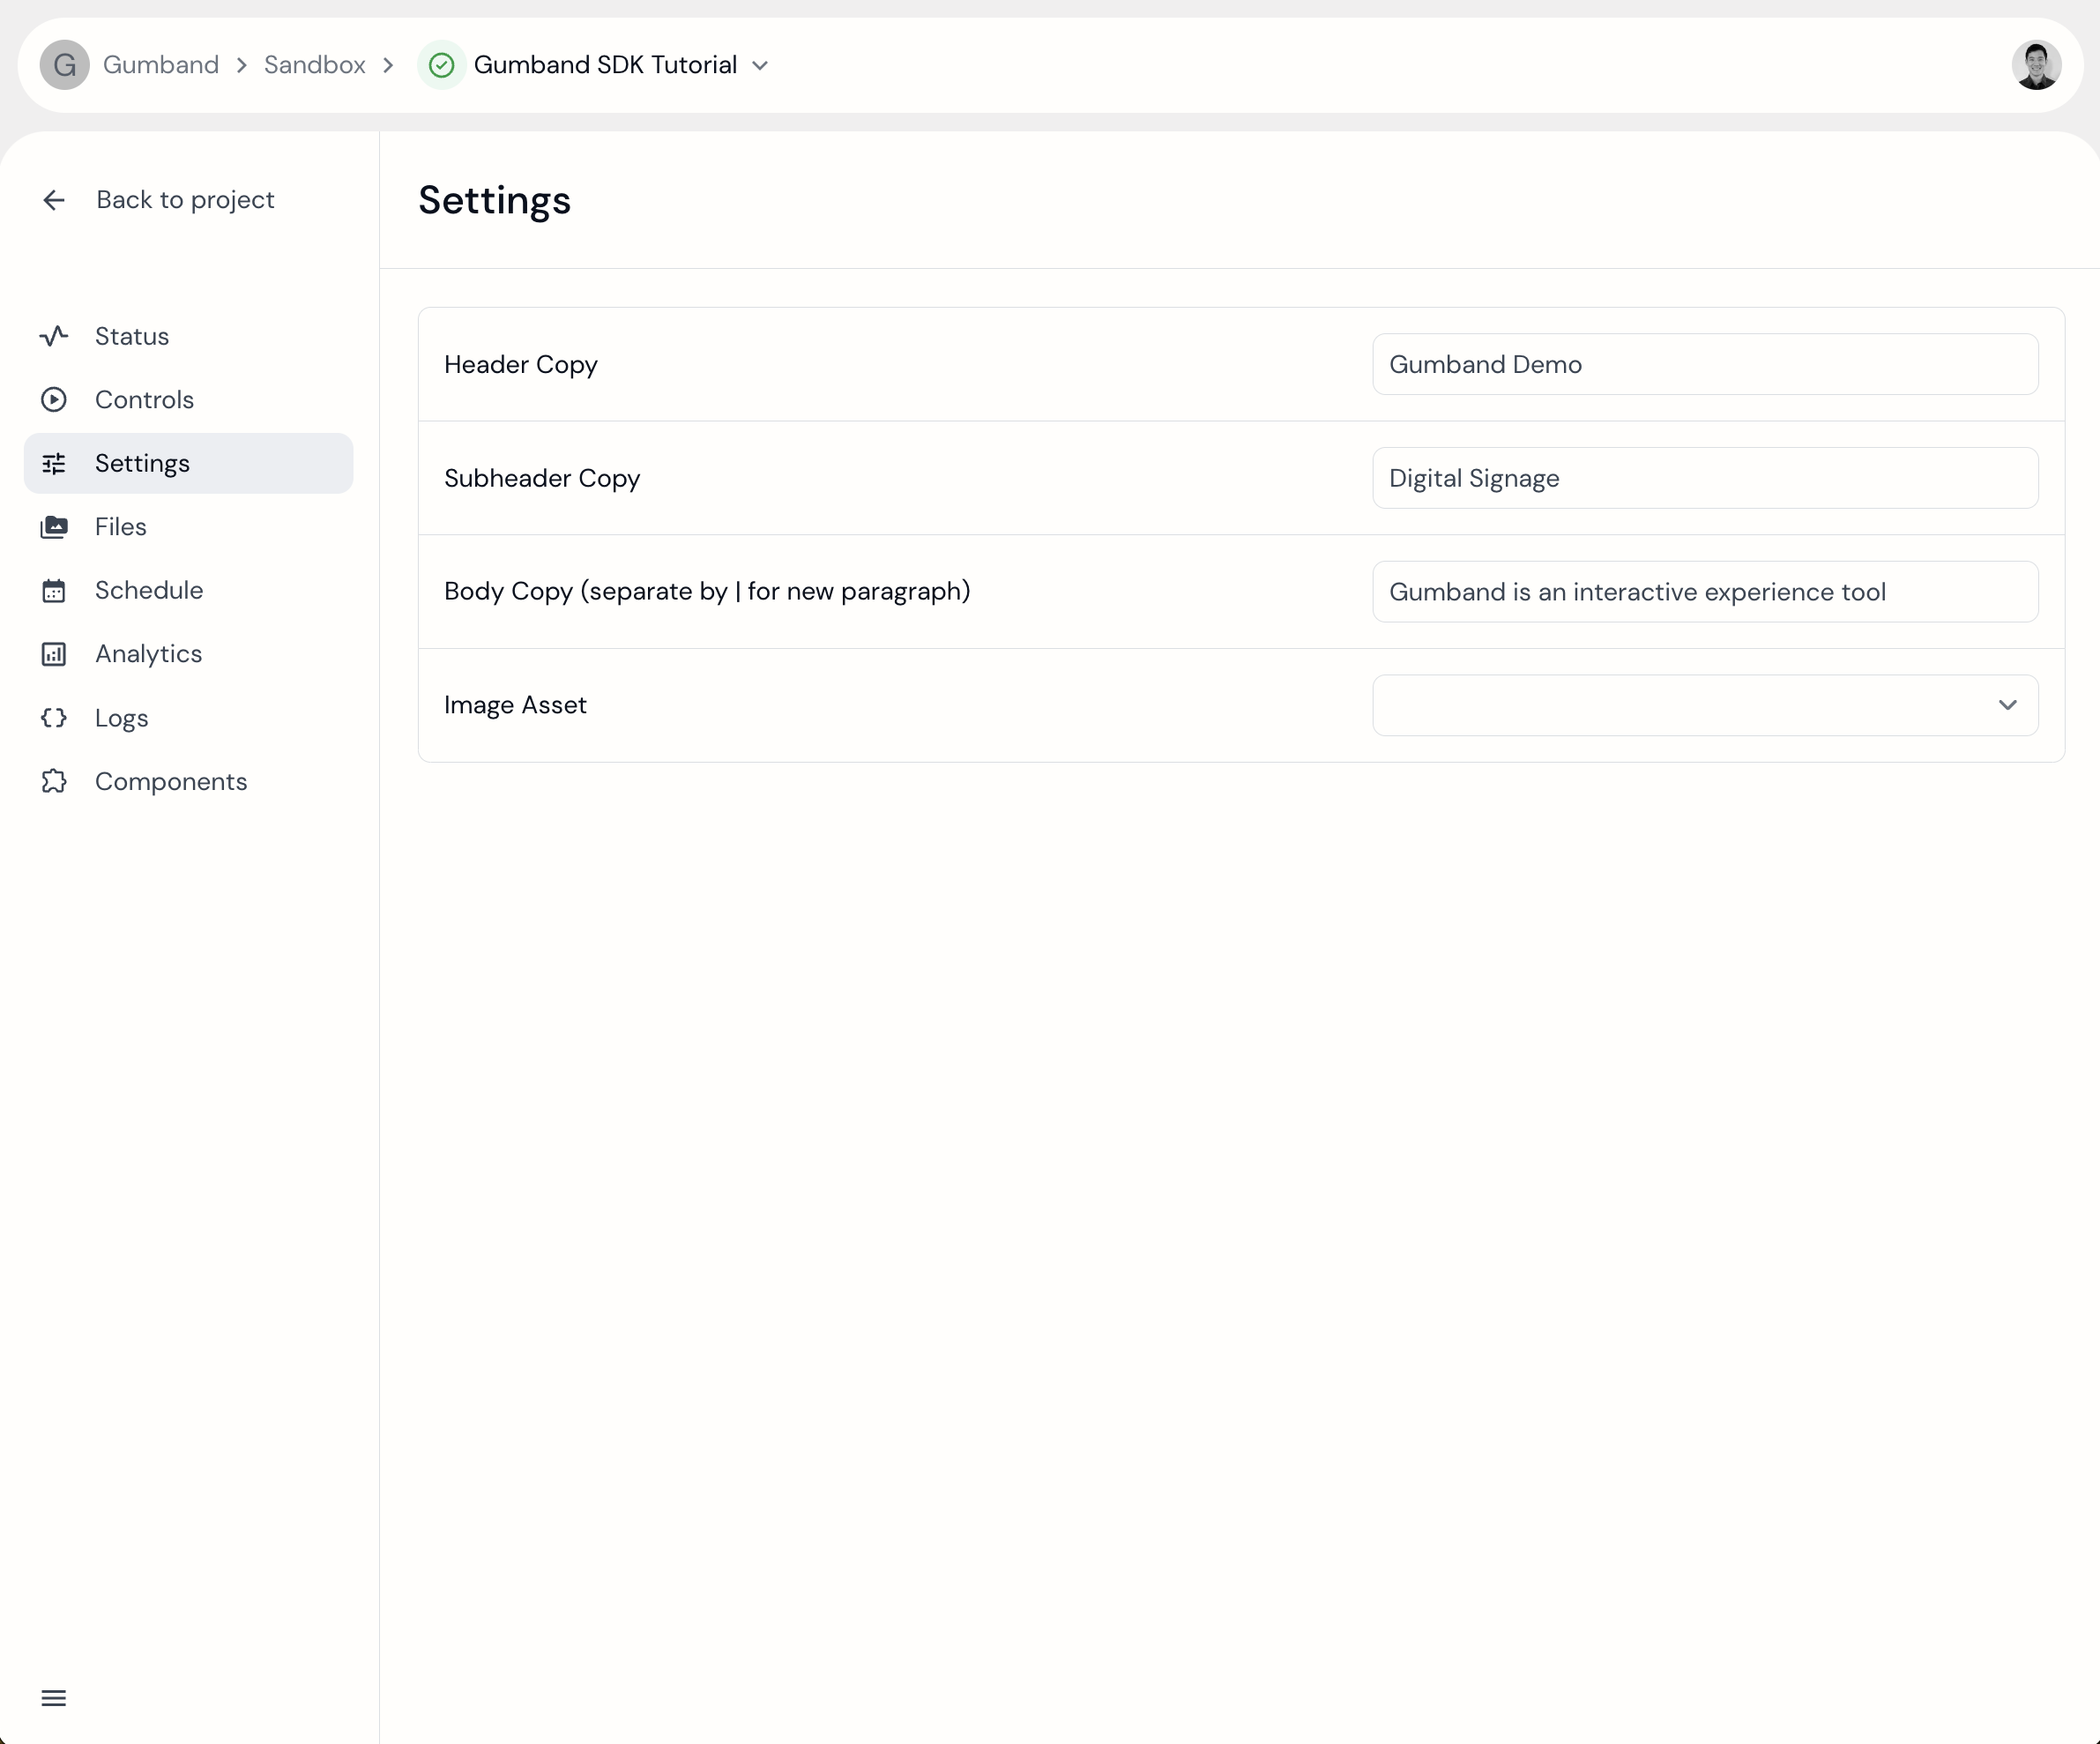 Settings in the Gumband UI.
Settings can be set both in the Gumband UI and by the exhibit itself. If a setting is changed in the Gumband UI, a websocket event will be emitted through the Gumband SDK, which can be listened for through the SETTING_RECEIVED event:
- Node.js
- Python
...

this.gumbandSDK.on(Sockets.SETTING_RECEIVED, (payload) => {
    console.log(`${payload.id} setting updated in the Gumband UI to: ${payload.value}`);
    this.updateFrontendFromSettings();
});
...

def __init__(self, exhibit_id, token, manifest):
  self.gumband.on(SocketEventType.SETTING_RECEIVED.value, self.on_setting_received)

async def on_setting_received(self, data):
  """
  Receive the changed setting value and print the result.
  """
  print(f"Setting Received:{data}")
On the other hand, if the exhibit triggers the setting change, that new value will immediately be shown in the Gumband UI. The exhibit can change a setting through the a provided library function:
- Node.js
- Python
...

function changeSetting(manifestId: String, newSettingValue) {
  //where the manifest_id is the "id" of the setting in the manifest.
  //In the example manifest above, the manifestIds are "header", "subheader", "body", and "main-image"
  this.gumbandSDK.setSetting(manifest_id, new_setting_value)
}
...

change_setting(self, manifest_id: str, new_setting_value):
  #where the manifest_id is the "id" of the setting in the manifest.
  #In the example manifest above, the manifest_ids are "header", "subheader", "body", and "main-image"
  self.gumband.set_setting(manifest_id, new_setting_value)
There are many different types of settings for various use cases. See the Exhibit Manifest Configuration doc for a complete list.
Creating Settings At Runtime
Sometimes, an exhibit will need a way to introduce more settings at runtime. This typically occurs when you need to integrate with a variable number of similar external devices, and therefore it needs to be able to manage a variable number of groups of settings. For this use case, you can utilize the SettingsList setting type. Check out the guide on SettingsLists for more information.
Trigger Events with Controls
Controls are events that can be triggered through the Gumband UI. Common use cases for controls are restarting an application or triggering some sort of test content or animation to help with debugging. Like statuses and settings, controls are unique per exhibit and can be configured through the manifest. For example:
- Node.js
- Python
export const MANIFEST = {
  manifest: {
    statuses: [],
    controls: [
      {
        id: 'reload-frontend',
        type: 'Single',
        display: 'Reload Frontend',
        order: 0,
      },
      {
        id: 'toggle-game-mode',
        type: 'Single',
        display: 'Toggle Game Mode',
        order: 1,
      },
    ],
    settings: [],
  },
};
MANIFEST = {
  "manifest": {
    "statuses": [],
    "controls": [
      {
        "id": "reload-frontend",
        "type": "Single",
        "display": "Reload Frontend",
        "order": 0,
      },
      {
        "id": "toggle-game-mode",
        "type": "Single",
        "display": "Toggle Game Mode",
        "order": 1,
      },
    ],
    "settings": [],
  },
}
This manifest would configure controls for the following exhibit instance in the Gumband UI:
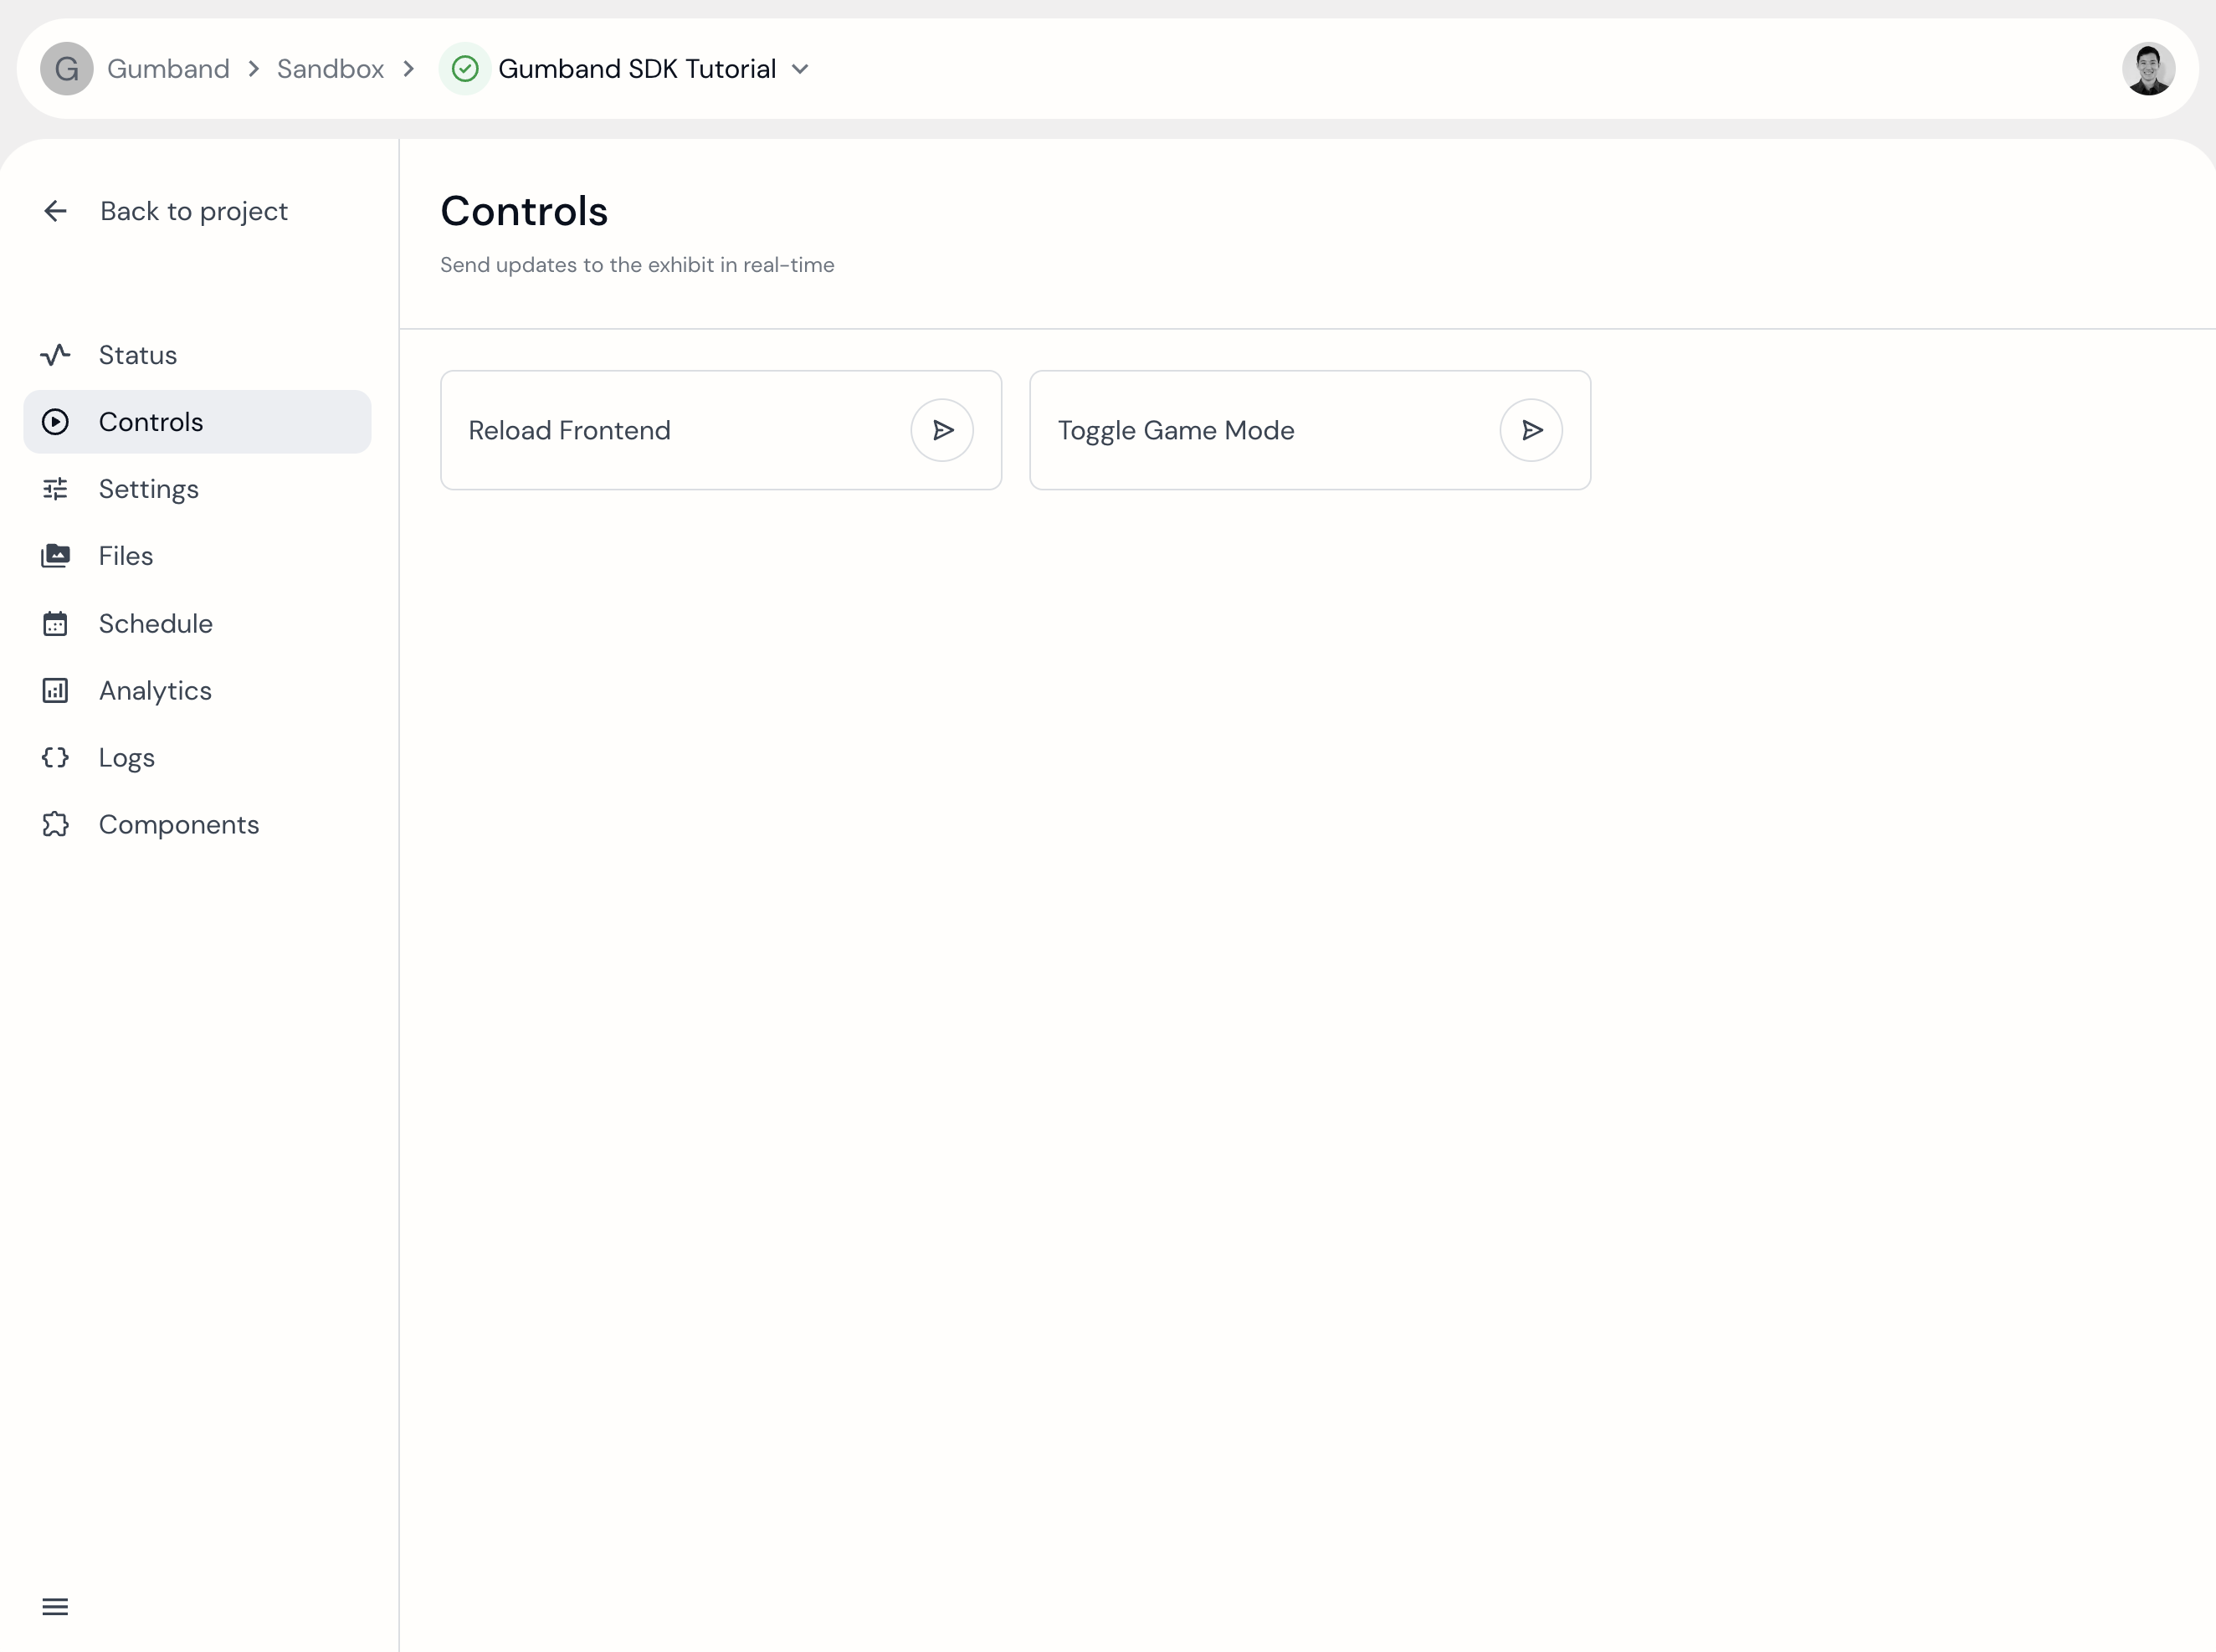 Two control buttons in the Gumband UI.
Controls are one-way communications from the Gumband cloud to the exhibit. You can listen for a control event through the CONTROL_RECEIVED event listener callback through the SDK:
- Node.js
- Python
...

this.gumbandSDK.on(Sockets.CONTROL_RECEIVED, async (payload) => {
    if (payload.id === 'toggle-game-mode') {
        this.toggleGameMode();
    } else if (payload.id === 'reload-frontend') {
        this.reloadFrontend();
    }
});
...

def __init__(self, exhibit_id, token, manifest):
  self.gumband.on(SocketEventType.CONTROL_RECEIVED.value, self.on_control_received)

async def on_control_received(self, payload):
  if payload.id == 'toggle-game-mode':
    self.toggle_game_mode()
  elif payload.id === 'reload-frontend':
    self.reload_frontend()
Manage Files Remotely
With Gumband you can configure your exhibit to automatically download files that are uploaded to the Gumband UI:
- Node.js
- Python
import { Gumband } from "@deeplocal/gumband-node-sdk";
import { MANIFEST } from "./manifest.js";

this.gumbandSDK = new Gumband(
  process.env.EXHIBIT_TOKEN,
  process.env.EXHIBIT_ID,
  MANIFEST,
  {
    //Gumband will download any files uploaded to Gumband and place them in the specified directory
    contentLocation: "./a/specified/directory"
  }
);
from gumband_python_sdk import Gumband, GumbandOptions

class GumbandWrapper:
  def __init__(self, exhibit_id, token, manifest):
    """
    Initialize the GumbandWrapper with necessary parameters.
    """
    self.gumband = Gumband(
      exhibit_id=exhibit_id,
      token=token,
      manifest=manifest,
      # Gumband will download any files uploaded to Gumband and place them in the specified directory
      options=GumbandOptions(content_location="./a/specified/directory")
    )
This constructor option tells the SDK that any files uploaded to Gumband for this exhibit should be downloaded to the specified directory. For more info on how to upload files to the Gumband UI, see the User Interface docs.
With the code, above, the SDK will automatically sync files from Gumband, but only when the Gumband class is first initialized. In order to sync files uploaded while the exhibit is running, you'll need to listen for the FILE_UPLOADED event and manually trigger a file sync:
- Node.js
- Python
...

this.gumbandSDK.on(Sockets.FILE_UPLOADED, async (payload) => {
  console.log(`File uploaded: ${payload}`);

  //Sync local files with remote files.
  await gb.content.sync();
  console.log('Done updating files.');
});
def __init__(self, exhibit_id, token, manifest):
  ...
  self.gumband.on(SocketEventType.FILE_UPLOADED.value, self.on_file_uploaded)

async def on_file_uploaded(self, payload):
  print(f"File uploaded: {payload}")
  # Sync local files with remote files.
  await self.gumband.sync_content_files()
  print(f"Done updating files.")
Now your files will sync as soon as a new file is uploaded to Gumband.
Analytics
As the analytics feature is the most complex module provided through the SDK, it is highly recommended that you read through our in-depth analytics guide before integrating it into your exhibit.
Gumband analytics is a feature set that allows you to draw meaningful insight as to how users are engaging with your exhibit. Out of the box, we provide a way to measure the number and duration of user interactions, but, if needed, additional visualizations can be added based on your specific use case. Check out our Charts Catalog for more information on what chart visualizations are available.
The most minimal approach to using the analytics module can be seen below:
- Node.js
- Python
...

function handleBlueButtonPress() {
    this.gumbandSDK.metrics.create('Button Press', { buttonColor: 'Blue' });
}
...

async def handle_blue_button_press(self):
  await self.gumband.create_event('Button Press', { button_color: "Blue" })
This will send a "Button Press" event to Gumband with the included metadata object.