Tutorial
This document is intended for Gumband Developers looking to integrate hardware into their Exhibit
This Tutorial will walk you through a basic example of how to use the Gumband Library for a hardware device in the Arduino IDE.
- This tutorial assumes that you have already installed the Arduino IDE and have installed the appropriate version of Gumband for your board.
- The examples in this tutorial use the Gumband Development board. The calls should be the same for the Gumband Library parts, but there may be some minor differences in interfaces
Create a Token
-
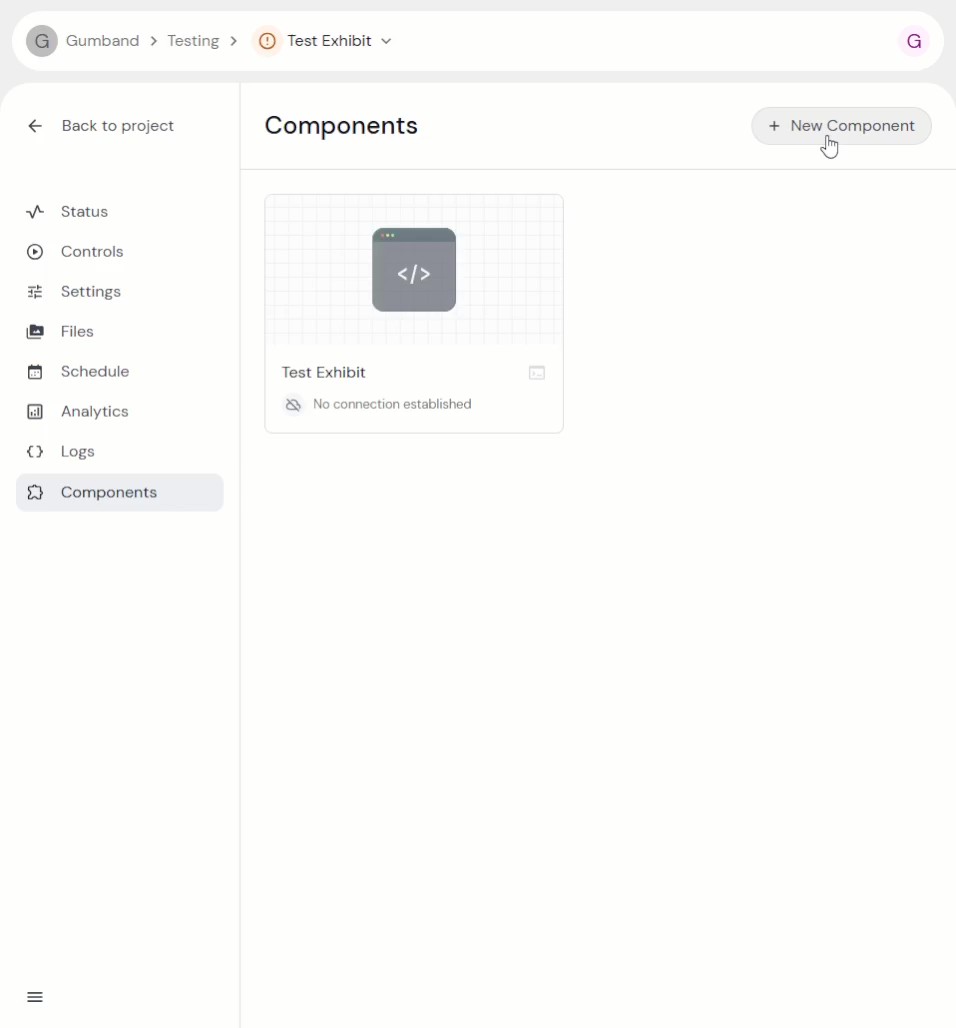
Click on "New Component" in the Components section of the Exhibit you plan to work in for this tutorial.
-
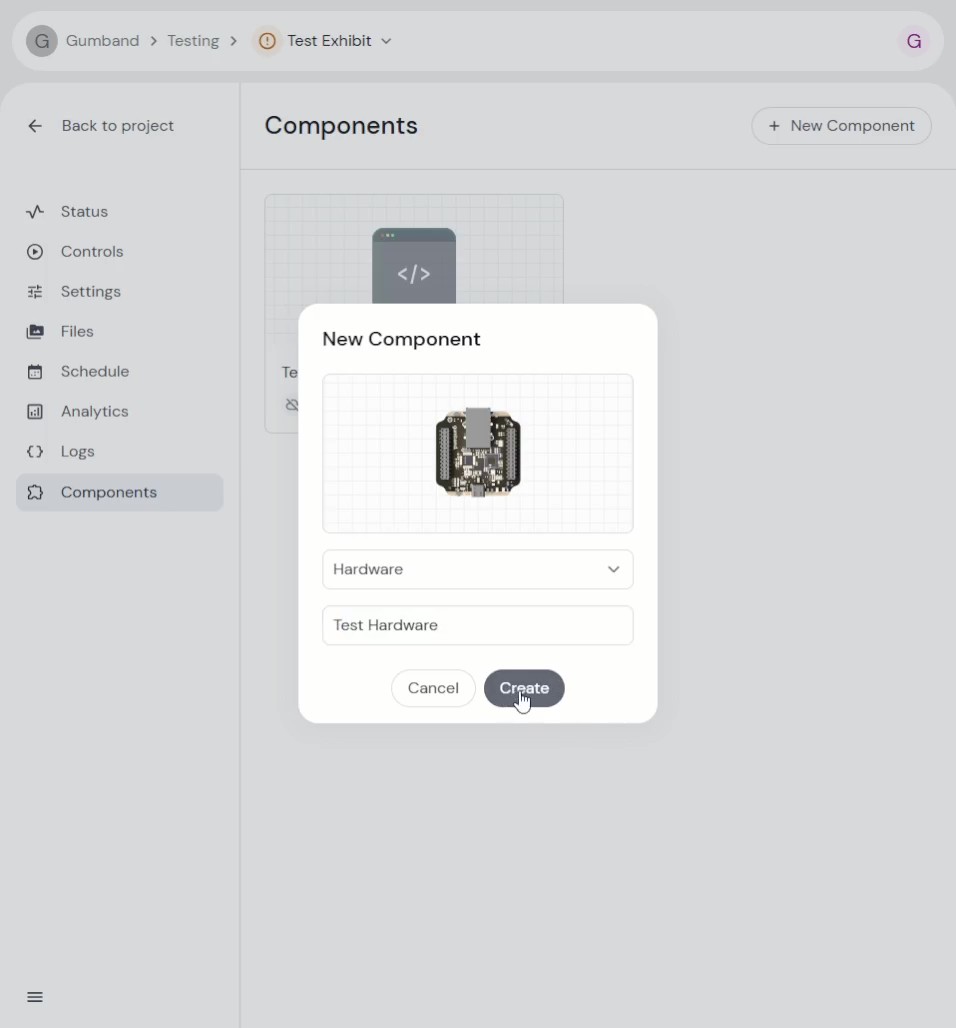
Select "Hardware" for the Component Type and enter a name for the device. Then click "Create".
-
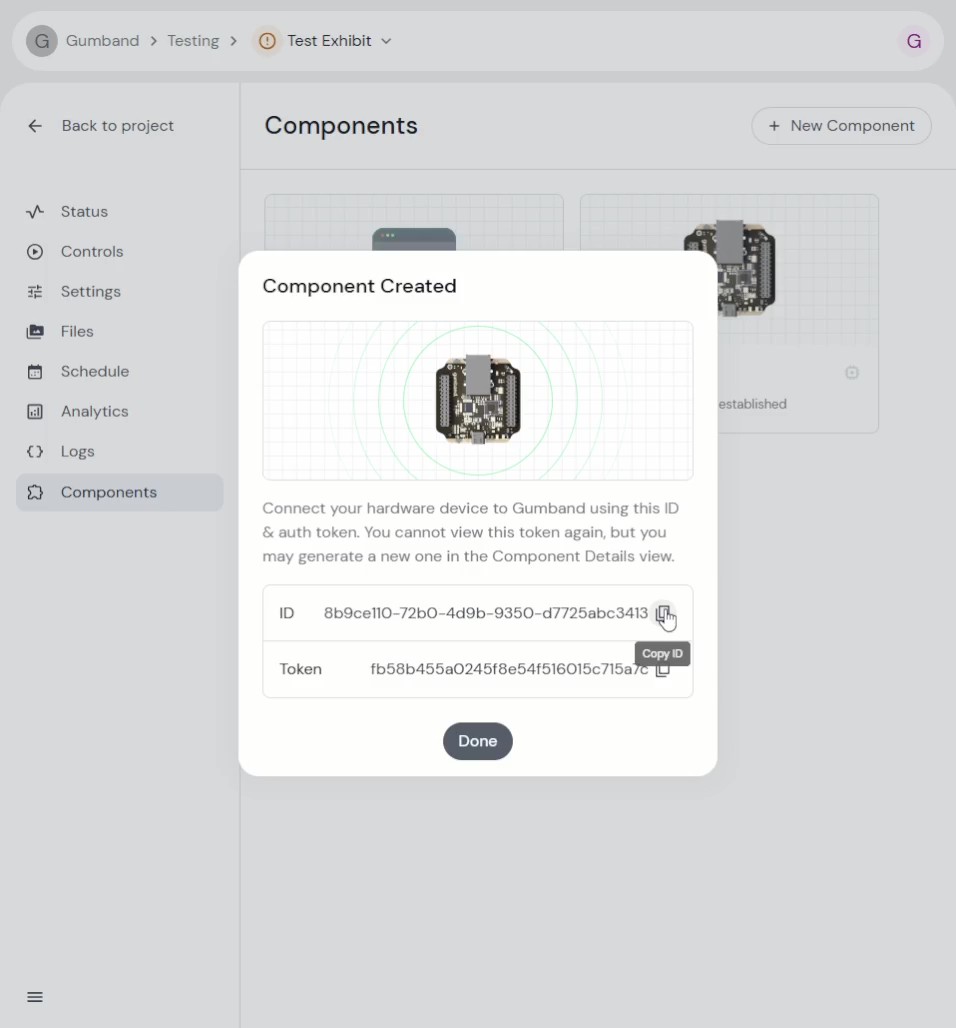
Save the ID and Token somewhere you can refer to them later when setting up the hardware.
Create an Arduino Sketch
-
Set the credentials in the sketch
#include "gumband_api.h"

#define ID "8b9ce110-72b0-4d9b-9350-d7725abc3413"
#define TOKEN "fb58b455a0245f8e54f516015c715a7c"

void setup() {
  // Initializes the Gumband interface
  gumbandInit();

  // The Gumband Development board handles the network stack outside of
  // this code. Follow the instructions for your board to establish a connection.
  gumbandSetCredentials(ID, TOKEN);

  // Setup Gumband
  gumbandSubscribe();
}

void loop() {
  // This handles any gumband related events
  gumbandUpdate();
} -
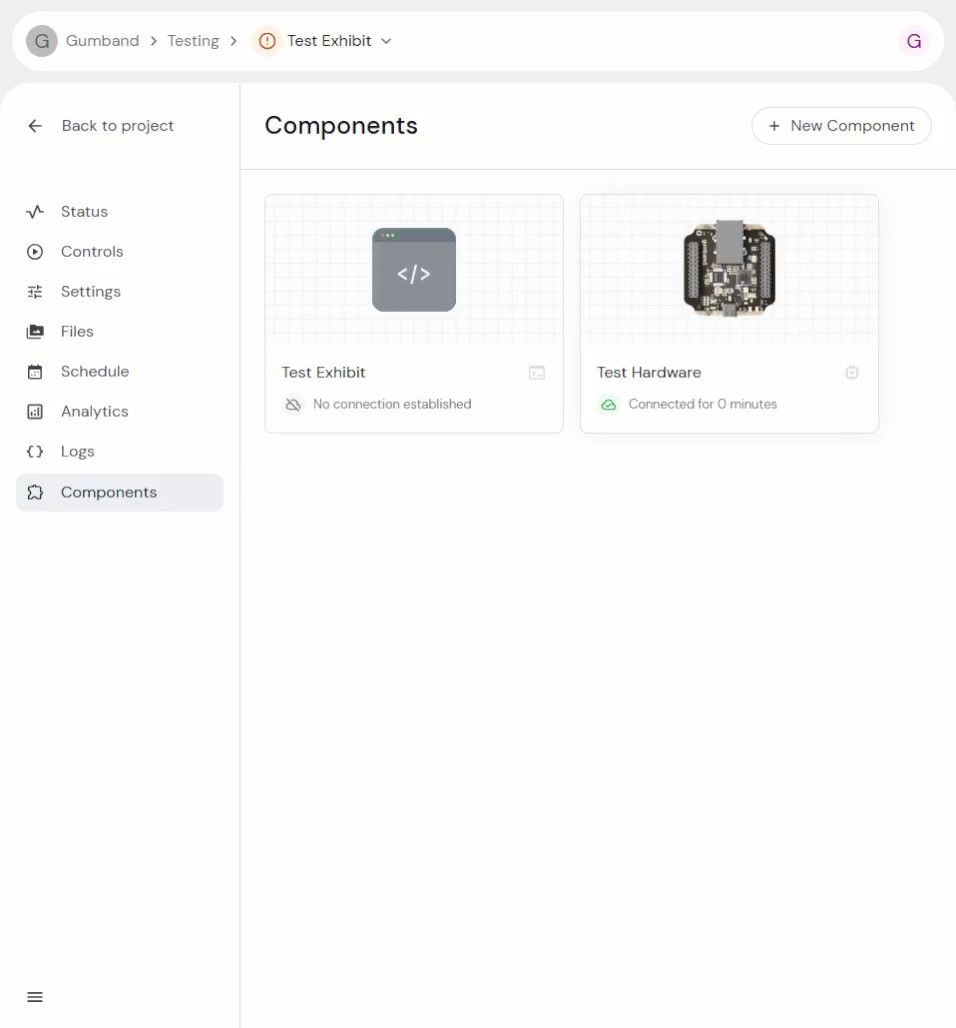
Upload the sketch to your board and wait for the device to connect to Gumband. The will be a green connected icon in the dashboard once it's connected.
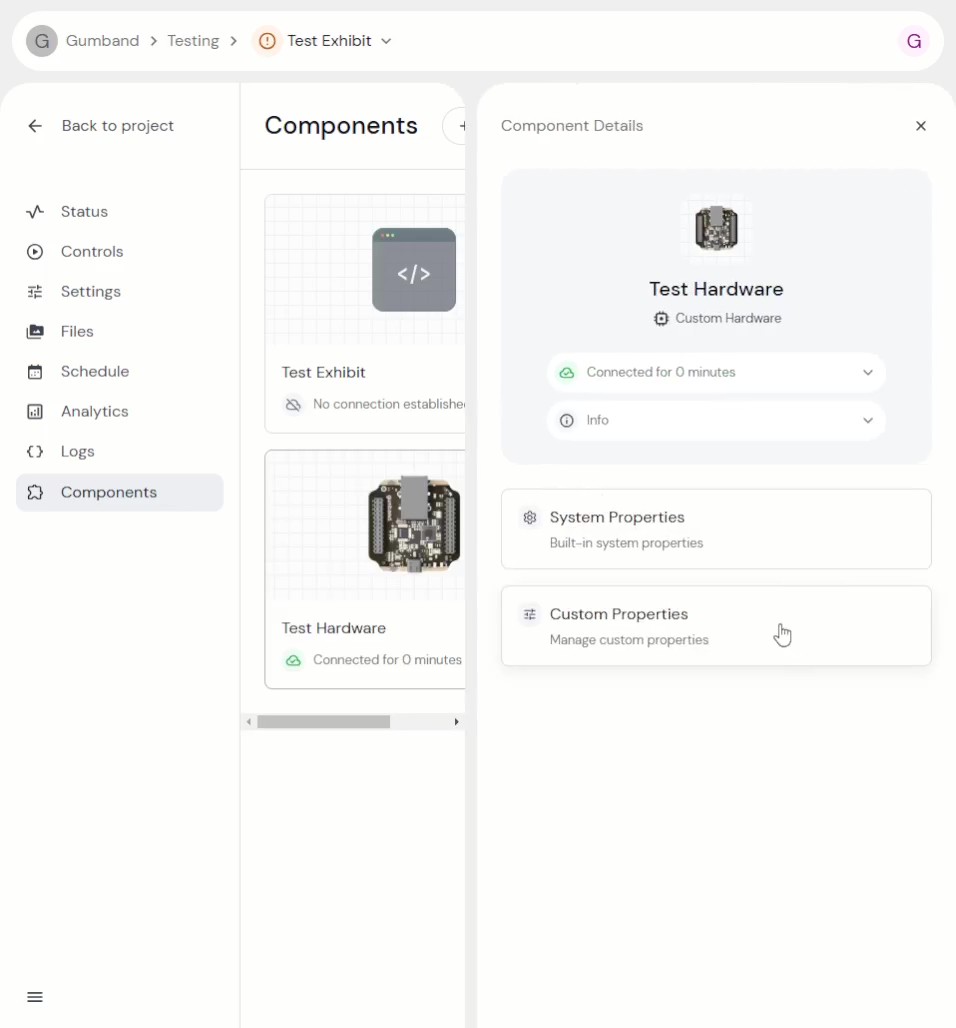 The Custom Properties tab are where properties defined in your code will show up.
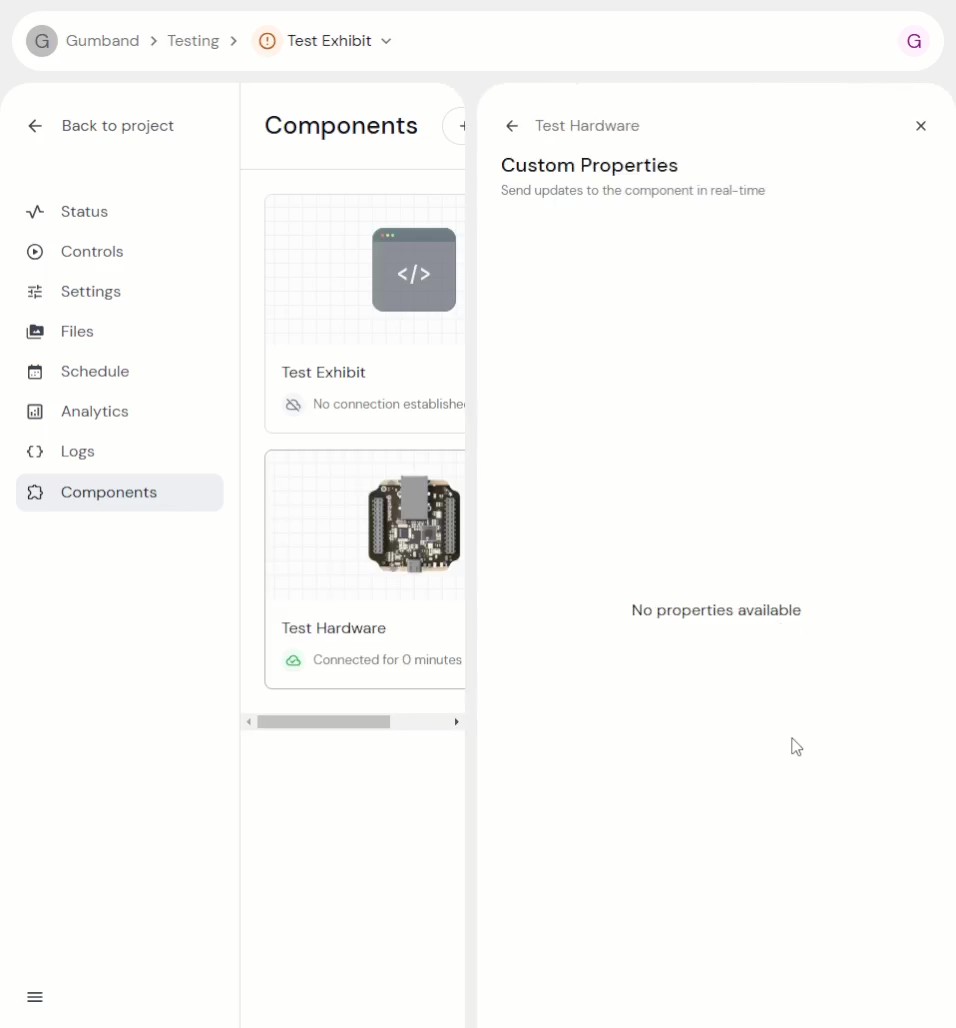 They will be empty to start.
Add a Gumband Property to keep track of button presses
For the first property, lets create a read-only property that increments whenever the "User Button" on the hardware is pressed.
// ...

// Gumband Development Board specific APIs
#include "psoc_api.h"

// ...

// Gumband Property object to store the count
GumbandInt counter_prop = GumbandInt("Button Count");

void setup() {
  // ...

  // Publish the property whenever it's written to
  counter_prop.setPublishOnWrite();
  // This property won't need to be set from the dashboard
  counter_prop.setPermissions(PROP_READ_ONLY);

  // ...
}

void loop() {
  // ...

  // Detect if the button is pressed
  if (psocButtonIsPressed()) {
    // Increment the Gumband Property. The updated value will be published since
    // we set the property to "publish on write".
    counter_prop = counter_prop.getValue() + 1;

    // Hang out while the button is pressed (the poor man's edge detect)
    while(psocButtonIsPressed()) continue;
  }
}
When the button on the device is pressed, the "Button Count" increments
Reset the count from the dashboard
So now that we have data coming from the hardware and being displayed on the dashboard, let's go the other direction and send data from the dashboard down to the hardware. For starters we'll create a simple reset button that resets the current count back to 0.
// ...

// A trigger property has no data value. This will work effectively like a button for our use case.
GumbandTrigger reset_prop = GumbandTrigger("Reset");

void reset_count() {
  counter_prop = 0;
}

void setup() {
  // ...

  // This property is only sending data from the dashboard, it doesn't need to be queried by the dashboard
  reset_prop.setPermissions(PROP_WRITE_ONLY);
  // Set the callback to handle when the property is written
  reset_prop.setWriteCallback(reset_count);

  // ...
}

// ...
The count resets when the button is pressed
Send data through the dashboard
The Trigger type doesn't send any data, so let's add something that handles the data coming from the dashboard.
// ...

GumbandInt reset_value_prop = GumbandInt("Reset Value");

void reset_count() {
  // Gumband handles keeping track of the property value so if you don't need to do anything when
  // receiving the property, you don't need to attach a callback handler
  counter_prop = reset_value_prop.getValue();
}

void setup() {
  // ...

  // The reset value can be queried, so it's appropriate for this to be a Read/Write value
  reset_value_prop.setPermissions(PROP_READ_WRITE);

  // ...
}

// ...
The count resets to the "Reset Value" when the "Reset" button is pressed
Send data and trigger an action at the same time
For demonstration purposes, let's say that we want to reset the count to the value that's set in the "Reset Value" when it's sent, not just when the Reset button is hit.
// ...


// Write the value to the counter immediately when the value is received
void reset_with_value(GumbandInt* updated_prop) {
  counter_prop = updated_prop->getValue();
}

void setup() {
  // ...

  reset_value_prop.setWriteCallback(reset_with_value);

  // ...
}

// ...
The count resets to the "Reset Value" when the value is updated or the "Reset" button is pressed
Summary
There are other examples provided in Arduino for the Gumband Library for specific features, but hopefully this served as a good starting point and makes understanding those examples easier.
Here's the final code output from the tutorial.
#include "gumband_api.h"

// Gumband Development Board specific APIs
#include "psoc_api.h"

#define ID "8b9ce110-72b0-4d9b-9350-d7725abc3413"
#define TOKEN "fb58b455a0245f8e54f516015c715a7c"

// Gumband Property object to store the count
GumbandInt counter_prop = GumbandInt("Button Count");

// A trigger property has no data value. This will work effectively like a button for our use case.
GumbandTrigger reset_prop = GumbandTrigger("Reset");

GumbandInt reset_value_prop = GumbandInt("Reset Value");

void reset_count() {
  // Gumband handles keeping track of the property value so if you don't need to do anything when
  // receiving the property, you don't need to attach a callback handler
  counter_prop = reset_value_prop.getValue();
}

// Write the value to the counter immediately when the value is received
void reset_with_value(GumbandInt* updated_prop) {
  counter_prop = updated_prop->getValue();
}

void setup() {
  // Initializes the Gumband interface
  gumbandInit();

  gumbandSetCredentials(ID, TOKEN);

  // Publish the property whenever it's written to
  counter_prop.setPublishOnWrite();
  // This property won't need to be set from the dashboard
  counter_prop.setPermissions(PROP_READ_ONLY);

  reset_prop.setPermissions(PROP_WRITE_ONLY);
  reset_prop.setWriteCallback(reset_count);

  // The reset value can be queried, so it's appropriate for this to be a Read/Write value
  reset_value_prop.setPermissions(PROP_READ_WRITE);
  reset_value_prop.setWriteCallback(reset_with_value);

  // Setup Gumband
  gumbandSubscribe();
}

void loop() {
  // This handles any gumband related events
  gumbandUpdate();

  // Detect if the button is pressed
  if (psocButtonIsPressed()) {
    // Increment the Gumband Property. The updated value will be published since
    // we set the property to "publish on write".
    counter_prop = counter_prop.getValue() + 1;

    // Hang out while the button is pressed (the poor man's edge detect)
    while(psocButtonIsPressed()) continue;
  }
}